[0:00]Press the white button to turn on the instrument. Click on the Vision 64 icon to start the software.
[0:25]Click unload sample to make sure the stage is in the correct position.
[0:34]Carefully place the sample on the stage.
[0:44]You can now click the load sample button. The stage slides back under the stylus. You can now click Tower Down. Make sure the sample is underneath the stylus, otherwise use the black knobs to adjust the sample position before the stylus gets close to the sample.
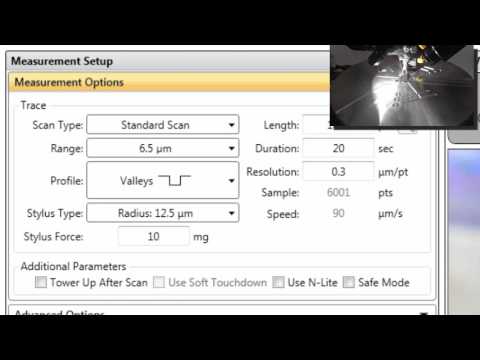
[1:09]Select a profile that is consistent with the features on the surface of your sample and a scan range commensurate with the height of the features on your sample. You can now click single acquisition to start the measurement.
[1:28]As the sample is being scanned, you can observe the topography of your sample on the right hand side.
[1:37]Once the measurement is done, the software automatically switched to the data analysis view. Adjust the width of the M and R markers, then place them in two area of the scan that should be at the same height. To level the profile, right click, level two point linear. To measure the height of a feature, move the M marker to the top of that feature. To export the profile as ASCII, right click, select export data.
[2:10]To save the data set in Vision 64 format, click save data set and then save your file.
[2:21]You can go back to the measurement view by clicking the measurement setup icon. To change sample or when you're done using the instrument, click the unload sample icon.
[2:44]You can now exit Vision 64.


