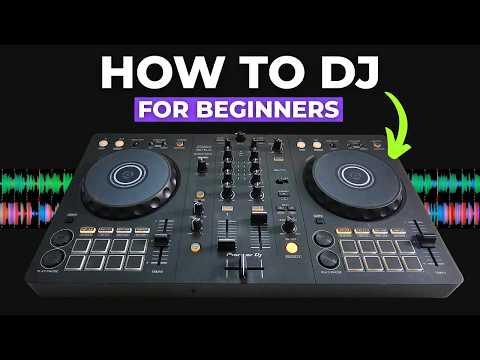
[0:00]In this video, I'm going to show you how to DJ. I'm going to show you exactly how to mix two tracks together with perfect timing. You can also download the tracks that I use in this video completely for free, so you can follow along exactly as I do with the exact same tracks. If that sounds good to you, let's get into it. All right, so if you go to the description of this video, you should find a link to be able to download the free tracks that I'm going to use in this video. Once you've downloaded them, you should get a folder just like this one, that if you click into, there should be two free tracks. What we need to do now is go into our DJ software, make sure that we're in playlists, which is the second icon down just here. Then just online with playlists, just click the plus icon, which will create a new playlist and just name it whatever you like. So I've just named it how to DJ. Then what we need to do is go back to our folder, highlight both these two tracks and just simply drag them over into the blank playlist. Now they should be analyzed by your DJ software and it should get them ready to DJ with. From here now, we just need to drag the track It's Been a While over on the left-hand side on Deck 1 and the track Baby Baby over on the right-hand side on Deck 2. Now in this video tutorial, I will be using record box DJ software and also the Pioneer DDJ-FLX 4 to demonstrate the techniques on. But if you're using different DJ software and a different DJ controller, you should be able to follow along still with the DJ techniques and principles I'm going to teach you. If you are on record box and your screen doesn't quite look like mine, just a couple of things you might want to change if you want it looking similar. Just go to the top left hand corner here and the second option across with just a couple of lines, select this and you want two-deck horizontal. And then also if you go into settings or preferences as it's called in record box, then go to view, then go to color along the top here. And then on waveform color just select RGB, which stands for red, green, and blue. Then your software should look something similar to this. Now the first thing we need to check is that the tracks have been analyzed correctly. So you need to put your tempo faders on both decks to zero, which is in the middle. And just check the track on the left hand side, it's been a while is at 130 BPM and the track Baby Baby is at 128 beats per minute. You also need to make sure that there is a grid line marker right at the very start of each track just like this, preferably with a red marker on as well. So the start of your track looks like this. Let me zoom them in slightly, so you can see it a bit more. So you can see here it's got a white grid line marker at the start of both tracks. If you've got all those things, we should be ready to go. Now the first thing that I'm going to cover when it comes to learning how to DJ, and in my opinion, one of the most important things that you need to understand when learning to DJ is what I call the rule of 32. This means that generally, every 32 beats in a track you'll hear a significant change, where a sound is added or taken away. Now before we get on to counting the 32-beat blocks, first we need to understand what a beat actually is. A beat is a measurement of time. It is not a sound. Often people can get confused with a beat being a sound, because in dance music, usually every beat there is a kick drum. If we have a look at the grid lines here on both tracks, we can see these white lines, these are the beats. And if we look at the top track here, we can see that this red waveform is a kick drum and at the start of every kick drum, there is a beat grid marker. So this is why sometimes you can get confused with people thinking that a beat is a kick drum. But it's not, it's actually a measurement of time. So if I press play on the track on the left hand side now, you can hear a kick drum every beat and you can also see it happen on every white line. However, if I go to a part in the track where there are no kick drums, we can still see that these white lines continue. So if we listen here, So you can still hear the track continue, but there are no drums, there's no kick drums, but we still have the beats continuing. This is important because what we're going to do now with the track on the right hand side is count in 32-beat blocks. We're going to count to 32 and when we get to 32, we're going to start again from one. And as we do this, I want you to listen out for the changes in the tracks at these points. Listen for sounds being added and taken away from the track, and this is going to be very important later when we come to timing our tracks and mixing them together. I'm going to put the numbers up on the screen, I'm also going to quietly count in the background. If you want to count along, feel free to do so. So you ready? 3 2 1. 1 2 3 4 5 6 7 8 9 10 11 12 13 14 15 16 17 18 19 20 21 22 23 24 25 26 27 28 29 30 31 32 1 2 3 4 5 6 7 8 9 10 11 12 13 14 15 16 17 18 19 20 21 22 23 24 25 26 27 28 29 30 31 32 1 2 3 4 5 6 7 8 9 10 11 12 13 14 15 16 17 18 19 20 21 22 23 24 25 26 27 28 29 30 31 32 1 2 3 4 5 6 7 8 9 10
[5:35]All right, so there you go. As we counted along with that track then, hopefully you can hear how the track changes every 32 beats. Now we can call these 32-bit blocks phrases. So as a general rule, 32 beats equals one phrase. Now, like I've just said, this is a general rule to follow. I just want to be clear that not all phrases are 32 beats long. Sometimes you can have shorter phrases in a track, for example, 16 beats or an 8-beat phrase. Now the reason why I generally use 32 beats equals one phrase is because this is the metric that you're going to come across most of the time when DJ. And it's the easiest way to remember it when first learning how to DJ and when you come to time your tracks together, which I'm going to show you very soon. So if you were to press play on any of these two tracks here and count along with the tracks or even one of your favorite tracks, you will hear that the track generally have a change at these 32-beat blocks, which are called phrases. But if you just skip a further ahead on this track here, Baby Baby, where you can see on the full waveform, there's a little bit of a green section here. This is one of the rare 16 beat phrases. So you'll hear the track change after 16 beats instead of 32. So let's count along. 1 2 3 4 5 6 7 8 9 10 11 12 13 14 15 16
[7:05]Then if you were to continue counting from there, it goes back to the 32-bit phrase structure. So when it first comes to learning how to DJ, this is how I teach my students how to count beats. And it's in 32-beat phrases. You basically just count from 1 to 32 and then start again from one. But if you have watched other DJ tutorials, you might see that they count beats in a different way. What they actually do is count in terms of bars. These are four-beat blocks instead of 32-beat blocks. So you might hear people counting something like this. 1 2 3 4 1 2 3 4 1 2 3 4 1 2 3 4 1 2 3 4 And so on. This is counting in terms of bars, and when counting like this, a 32-bit block will be eight bars. Now personally, I don't like counting like this, especially when I teach my students, I find it's a little bit more confusing and a little bit harder to translate when it comes to timing two tracks together. And also if you were to set, let's say, a loop on a track, which we used this function here, you can see it's done in 32 beats and not eight bars. And I also like to use what's called beat jumper a lot. So if I just change this hot cue down here to beat jump, you can also see that it's done in 32 beats just here instead of eight bars. So there are two reasons as well, why I like to count in 32-beat blocks instead of four-beat bars. Now there isn't one right way or one wrong way, they are both correct. It's just whichever you might find easier. But for this video, I'm going to be counting in terms of 32-beat phrases and using that to demonstrate the techniques with. So just a quick summary before we move on, 32 beats equals one phrase. These are when you can find changes in a track, when sounds are added or taken away. Now there can be shorter phrases, e.g. 16 beats or eight beats, but these are less common. Most of the time you're going to come across a 32-beat phrase, so this is what we're going to use moving forward. The next thing we need to understand when learning how to DJ is what significant sounds are. This is another thing that I have come up with to help my students understand what the different sounds are and to help them categorize them and understand which ones you can layer and which one you cannot layer over the top of each other. So in general, there are four categories of sounds that you can find in a track. These are drums, bass, instruments, and vocals. Firstly, drums are basically any sounds that you can find on a drum kit. These are sounds such as kick drums, claps, hi-hats, and symbols. So if we listen to the start of this track here on the left hand side, you'll hear the kick drums, the high hats, and the claps. And also the track on the right hand side now, there's no kick drums, there's no red waveforms, but you can hear the blue high hats and the green claps. So there are all drum sounds.
[10:17]Next we have the base. This is the low frequency sounds that can have a pattern and a rhythm and change notes. So continue to listen to the track on the right hand side, Baby Baby, just here as the red waveform comes in, you should be able to hear the kick and the bass come in. So that the low frequency sounds.
[10:46]Next we have the instruments. This can be things such as the piano, saxophone, or even synths. They are artificial sounds that are made by a computer. So just at this point in the track as well, you can also hear a piano coming in.
[11:06]That's the piano on top of the base. The instruments generally make up the main melodic elements and the catchy parts of the track that you should be able to hum along to and you should be able to remember. And lastly, we have the vocals. This is obviously just when somebody is singing or rapping. So if we listen to the next bit of this track now, we should be able to hear just the piano, which is an instrument and the vocals. And what we're going to do is separate these four sounds into two different groups. This is going to be non-significant sounds and significant sounds. In the non-significant sounds group, we're going to put all of the drums, that's the kicks, claps and hi-hats. In the significant sounds group, we're going to put everything else, which is the bass, instruments, and vocals. I'm going to explain now exactly why I've split them into two different groups just like this. Firstly, I've put the drums in the non-significant group, because if you just listen to the drums off the track, you cannot really often tell what track it is. So if you listen to the start of this track on the left here, that is just drums and that can pretty much be any track. Now, another reason why drums are non-significant is that you can play drums over any part of another track and it shouldn't clash and sound bad. So, for example, if we go to the start of the track here on, it's been a while, and we play these drums over any part of the track on Baby Baby, it shouldn't sound too bad. Shouldn't interfere with the main sounds of the track. Let's have a listen. All right, so let's just press play over the top. All right, so that doesn't sound too bad. Let's flick through the track. So it doesn't really interfere that much. If I stop the track on the left, it doesn't sound too bad. Let's try again, let's press play. This is the reason why the start and the ends of tracks generally just have drums. This is so that you can mix them over the top of other tracks and slowly start to introduce that new track. So often the intros of tracks will only have drums. And this is why we're going to put them in the non-significant group. Now on the other hand, in the significant sounds group, with the bass, instruments and vocals, these are different. Generally, when these sounds come in on a track, you will recognize the track instantly if you've heard it before. So for example, on the track It's Been a While, when it gets to the end of the drums and the vocals and instruments come in, you should be able to recognize it if you have heard it before. So what I've done here is a basic diagram just so you understand this concept a little bit more. These blocks here on the left hand side represent the end of the track, it's been a while. And then these blocks here on the right hand side represent the start of the track, Baby Baby. And what I've done is drawn out the 32-bit blocks just here and what they represent. So it goes from the break, and then we've got three 32-bit phrases of drop section, then the significant sounds end, and then two outro phrases. And at the start of the track, Baby Baby, we have 1 32-beat phrase of intro beats, then it goes into a drop section, which has kick, bass and instruments and then two of break and then one in drop. But the main thing to notice is that the significant sounds start right here. The first example that we did incorrectly, where we pressed play right on the first beats of the drop section here, which was like this, and we could hear that there was two phrases overlapping there with the same significant sounds and that is why it sounded bad. And then the second example where we press play at the start of the outro, which looks like this, we can see in the middle we had one phrase of just drums, which sounded quite flat and it wouldn't be the best to mix to a live audience. And what we just did on the last mix, which was, in my opinion, the correct way to DJ, is we overlapped the intro with the last drop section so that when one track significant sounds ended, the next track significant sounds began. And we overlapped them, kind of like Tetris blocks, to make sure they're linked together and have a perfectly timed mix. Now, when DJ, we don't really just want to press play on the next track and let them switch over by themselves. We ideally want to do a little bit of mixing as well and blend the tracks together a little bit more smoothly. So what I'm going to do is just show you some very basic mixing using only two things. Just to make sure that these transitions don't start and end too suddenly and not as so abrupt for the listener. So the two things that we're going to use today are the channel faders and the low EQ dial. So this time, before we press play on the new track, we're already going to have the channel fader all the way down and also the low EQ dial turned all the way down. Then when we press play on the new track, we're slowly going to introduce it first with the channel fader going from zero to 100, nice and slow over the first 32 beats of the mix. Then just as the second two hot cues pass over the play head and the significant sound switch over, we're also going to switch over the low EQ dial as well, effectively switching the bases and the low frequencies of the track. Then we're going to slowly pull the channel fader down on the track that we're mixing out of until it's completely at zero, and hopefully again try and time that within the 32-bit phrase structure. So just as it goes into the break on the new track, this should then be hitting zero. So again, just quickly, it'll go channel fader first, just fade it in nice and slow, switch the low EQ dials halfway through the mix and then pull the other track out with the channel fader.
[19:59]Now the reason why we're only using the low EQ dials to mix the tracks and switch them over in the middle is because as a general rule when DJing and mixing, you only really want one low EQ dial up at a time. This is because the low frequencies carry the most energy in a track. This is mainly where the kick and the base sit in the track in their low frequencies. These are also the red colors on the waveform here at the top and on the full waveforms. The lower frequency sounds have bigger sound waves. And this is why you'll have subwoofers and the bigger speakers for the low frequencies in venues such as clubs and at festivals. This is because they need the biggest speakers to be able to create them bigger sound waves. And if you've noticed when you're in a nightclub or at a certain venue or festival, when you go to the bathroom or the toilet, you can generally only hear the low frequencies coming through the walls. This is the same as if you have a neighbor that's having a party next door, it's generally only them low frequencies that you can hear coming through the walls, because these are the only frequencies that are strong enough and big enough and most powerful enough to get through and penetrate through those walls. This is one reason why we need to control the low frequencies over the mid and highs when mixing two tracks together, these are the frequencies that are going to cause the most problems for us if they do clash and overlap with each other. So what I'm going to do now is that exact same mix again with the same timing, but this time do a little bit of mixing with the channel faders and low EQ dial and if you follow along at home, watch how I do it and then try it just after as well. Let's do it and just listen to how this is a little bit more smoother than the first option. All right, so that is another perfectly timed DJ transition, but also with a little bit of beat matching and mixing as well, for a smoother transition. So we're just quickly jump back to the diagram here, just so you fully understand the timing of this mix and the principles. On the left this time, we have the track Baby Baby and the outro phrases of the track here. On the right hand side, we have the track It's Been a While and the intro phrases of the track. And we did our mix over these two intro phrases here, and then when it got to the break here, we stopped this track Baby Baby, so it didn't play the outro beats over the break. But that is the basic timing of it and hopefully these diagrams help you understand the principles behind the timing of a basic time mix as well. Now, even though you now know how to mix these two tracks together, and I've shown you a couple of examples and different ways to mix them, it is worth noting that not all tracks have the same structure and will require the same timing. So for example, if I drag another track up here on the right hand side, this one on the right here has two phrases until the significant sounds. Whereas the hot cues here are set up one phrase apart. So these hot cues wouldn't work for this new track. And you also have other tracks that might have four phrase long intros, or sometimes no intro at all. Another thing to consider is you might not also want to wait until the end of the track when the significant sounds end to do your mix. You might also want to mix in the middle of the track and mix a little bit faster when you DJ live, maybe mix over breaks, create your own mashups and create your own build ups as well using the effects. And to do all this effectively, you will need to learn different techniques and different principles of DJ that would take far too long to go over in just one video. And that is exactly why I have created a complete DJ course for beginners. The DJ course covers every single technique that you would need to be able to DJ live and create professional sounding DJ sets. I know because I have put every single technique that I use when I DJ live into that DJ course. And you can also be a complete beginner because I break everything down from start to finish in nice, easy and simple terms. And if we just head over to my website now, and that is the reason why I've called it Complete Beginner to Pro DJ Sets, DJ Course. That's because at the end of this DJ course, you should be able to do professional sounding DJ sets even if you're a complete beginner. So if you are interested in an all-in-one solution, just head over to my website in the link in the description to this video and then just click here on more details. And I would just recommend watching this video here. It's only a few minutes long and it will tell you everything you need to know about the DJ course and give you a full breakdown. But if you do want to continue learning and watch a video from myself, I do have a video that I'm going to put up just here that you can watch to learn how to mix tracks together that have no intro beats at the start of it. Thanks for watching. I hope to see you again in the future. Bye for now.


