[0:00]What's up guys? My name is Liam and in today's video, we're going to be revisiting the Mons Geek M1 V5 TMR. This is a keyboard that I reviewed about a year ago. They have updated it with some different types of switches and other things that they've also changed. So I'm going to be highlighting some of the differences comparing it to the original keyboard that I originally reviewed on my channel. I still feel like this is a really solid option considering the fact that this does have the TMR technology in it. So if you just wanted to do, for example, WASD as magnetic switches and the rest mechanical, you can do that or any type of combination that you do prefer. So in this video, I'm going to be breaking down how my experience has been using this so far and hopefully by the end of this video, I'll be able to help you decide whether or not this could possibly be the perfect gaming keyboard for you. So let's check it out.
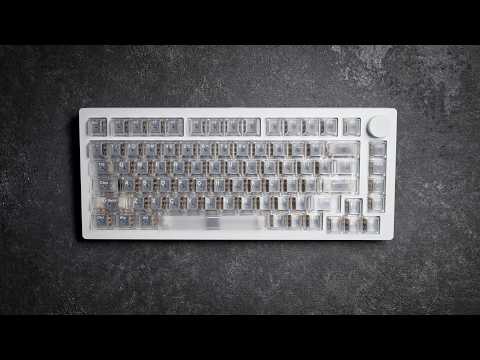
[0:49]And before we get started today, I did want to let you know this was sent out to me, however, everything you'll be hearing in this video is going to be my own words and my own opinions. Included inside the box, it does come with a USB receiver cuz this does have wireless capability. A white USB-C to USB type A cable, a switch puller and a keycap puller. So here we got the keyboard itself and as far as everything goes externally, nothing has really changed about it. It still got the 75% form factor layout, volume knob up here on the right hand side. This does have that magnetic function, so really simple to open up. We'll just do a really quick overview going around to refresh you guys' memory or if you never watched the first review. USB-C connectivity is here in the middle. Over back here on the rear, you do have these longer types of rubberized feet in each one of the corners. I do feel like this does sit planted nicely on your desk. wasn't sliding around on me or anything like that as I've been using it and there's not really a whole lot to say about the outside of this. Does sit pretty low, and as you can see, just a pretty simple type of a layout here. Uh nothing too different or unique. It does have these edges on it and I would say that they're a little bit more harsh, though they haven't been bothering me, they don't feel sharp. But this is still sporting an all aluminum build, so it does feel nice and tanky, a pretty premium filling overall that you're getting with this. Dropping it on my scale, looks like we're getting a pretty impressive 1,882 grams. And though this is still using the similar type of gasket mounted system, do the fact that this has a different switch plate. I would say that you do get a bit more of a stiffer typing experience. If I had to press pretty hard or put a lot of weight here in the middle, you can see a little bit of flex and give. However, I do feel like the previous version um did have a little bit more flex to it where this one does feel a little bit more stable and solid all around. The volume knob is one thing I want to tell you guys about here because it was kind of throwing me for a loop when I first started using this keyboard again. When you do press down in the middle, it does not mute. It will cycle between two different types of functions. So what I mean by that is when you do adjust the volume knob, it does actually adjust the volume on your system. When you press down instead of muting, what it does is it switches over to the LED brightness. I forgot that it did this when I first started using it and it was driving me nuts because the LEDs would just randomly shut off on my keyboard if I had accidentally bumped this wheel or something like that. So just something to keep in mind, you can reprogram all that inside of the web driver, but I just figured I'd give you guys a heads up on the functionality of that. And in case you never watched my previous video, again, this does have that magnetic ball system. I don't know the exact term for it, but to open this keyboard up, it's actually very simple. You just pull off this knob and just so you know, this is very easy to put on and pull off. One thing I did forget to mention is this is an infinite scroll knob, so it doesn't have like a maximum or minimum, you can just endlessly scroll it in either direction. Anyways, to take that off and you can kind of just feel around the bottom of the case where it does get separated between the bottom and the top. So if you want to press your fingers down here on the edges, you can do that. It makes it a little bit more simple. You can just push down in each one of the corners and the top of the case pops off, nice and simple just like that. And then you have everything laying inside of here. Do keep in mind if you were to remove this, there are some additional cables down here in the bottom that this is connected to as far as the batteries goes, and also a ribbon cable for the volume knob over here, so just keep that in mind, so you don't rip this out and risk breaking any of those cables. And then lastly, before we jump into the breakdown, I'll just show you really quickly, when you are putting this back together, just make sure that these rubber gasket pieces are lined in here, none of them are uneven, popping out or leaning up against the edge or anything like that. You could just simply put this back on here like this, press down, it'll snap into place, just as simple as that. Drop the volume knob on here and you're ready to go. Here's a look of the transparent key caps this does come included with. Over at the top, there's no noticeable texture, it just has that smoother type of a filling, a little bit more slippery feeling. I would say that I do prefer the gradient style PBT key caps that were included on the first generation board. And it does look like those are still an option when picking this up. Here's a really quick look of the switches that did come in the previous version. I want to talk more about these versus the new ones here in a little bit. When picking up this new board, you do have an option to pick up either these Astro aim or these Astro link switches. These are the Astro link switches that did come included in here and these do have a solid bottom. Unfortunately, I wasn't able to get my hands on the Astro aim switches, so I'm not really able to provide you much of feedback based off of what preference I would choose between both of them. These Astro link switches, they have an initial actuation of around 35 GF. The bottom out on them is a little bit lighter around 50 GF and these ones do consist of this wider single rail design. So just to give you my feedback comparing the older switches to these newer Astro link switches that I have here in my left hand. The one thing I will say about these first switches that the original copy did come with, these felt just like they're a little bit lighter and perhaps just a little bit more snappy. The one thing I do want to say about these, however, is that they just had like more of a clacky plastic type of a bottom out filling, even a sound signature to them. Let me go and put these up to the mic here really quick. And the one thing I will say about these newer Astro link switches, the sound signature on them is a bit more muted, but I don't feel like they're as clacky and they almost give you a softer style of a bottom out filling. Now even though the rebound on these does feel just a little bit slower, not really that much of a noticeable difference, I would say that I do feel like just overall that the typing experience on these switches is more enjoyable. They do come nicely pre-lubed out of the box and even though there are a single rail design, the entire time that I've been using these, just resting your hand on the keyboard, you don't notice any major noticeable switch wobble. Um no stem wobble, excuse me, so nice and stable. And even though these are the single rail design, even when you do press down on these, you don't have a whole lot of noticeable stem wobble. So overall, they still do offer you a pretty stable feeling overall. And I would say that just in general, these switches just feel nice. I have been enjoying using them. They did also change the switch plate in this version. I'll go ahead and bring up the previous version. I'm not exactly sure, I don't remember off the top of my head what the switch plate was made out of. The one thing I will say about the previous switch plate is it did offer a much more muted sound. And I'll do a back-to-back demonstration for you in the profile, whereas this one with the aluminum switch plate, this one does have a much brighter and just louder sound overall that you're going to be getting off of this keyboard. Another thing I will say about the previous switch plate that was included is that it did have a little bit more flex and give to it when you were typing on or pressing hard on top of the keyboard, where even though this is a gasket mounted design, with this aluminum switch plate, it does overall just give you a stiffer feeling with less noticeable flex. But taking a look at just the build of this, I will say the switch plate, the build on this feels great. I was checking all the tolerance on the switches all the way around. There's no noticeable switches being loose or anything like that, so nice and tight tolerances here on the filling of the switches. As far as the stabilizers go, they do come nice and pre-lubed. You get just a very minimal amount of play there, so nothing that's too obvious or noticeable. However, there is just a little bit of movement there and these also do just kind of snap into the back of the switch plate here. The gasket mounting design is still the same where it does have these silicone gasket pieces for the gasket mounted system. And here's just a really quick look of what the back of the switch plate does look like. For the sandwich foam, a couple things I want to point out here really quickly, standard types of things up here at the top where you do have a piece of foam, this piece right here, it just has basically two holes in it. For the Gateron style hall effect, uh magnetic types of switches. So what you will have to do is I'll go ahead and remove this piece right here. This does actually have the cutouts in it for the three pen or the five pin mechanical switches. So like I said, when you do first get this if you want to swap out the mechanical switches, you will need to just press them in here and puncture the holes into this piece right here. Here's a really quick look of the PCB. As you can clearly see, south-facing LEDs. And another thing I want to note is as I mentioned in my previous video, this still has the same power button over here. So what you have to do is you have to remove the caps lock key to get access to this switch if you did want to turn on the wireless connectivity. I do kind of wish that they would move it to the exterior of this case, make it quite a bit more simple. And then over here on the back of the PCB is where you do have an additional piece of foam over here on the rear. And then finally down here at the bottom is where you can see these two massive batteries for the wireless connectivity. When you do take this apart, do keep in mind you're going to have a ribbon cable that is connected over here to the volume knob, and you're also going to have these two power connectors right here that the battery attaches to the bottom of the PCB. So please do be mindful and careful when you do open that up. But then aside from that, you just have this piece of what feels like to be a plastic type of a sheet down here at the bottom, um sitting on top of this all aluminum base. So now let's go ahead and drop a really quick sound test. I will be comparing this new one. Also throw in the old one in here as well, so you can hear the differences.
[10:48]I'll do a really quick overview on the web-based driver since before when I previously reviewed this, they were just using a software, and the layout on this is a little bit different from that. Starting out, over here on the configuration tab up here at the top, you'll see this remap function. On the next tab is where you do have this magnetic switch setting option. Now, by default, it's going to allow you to adjust the press and the release. If you did want to gain access to the rapid trigger settings, you have to enable this continuous rapid trigger tab. Once that pops down, it's only going to give you one option. You'll have to also press on this tab right here to get control to both the press and the release. The actuation does allow you to go as low as 0.1 mm, and then after that you can make adjustments in a 0.01 mm increment. And then you can also make 0.01 mm rapid trigger actuation settings over here as well. I've also been using this false touch guard mode. It's been working out pretty good for me as the stability on this keyboard has been feeling pretty solid for me. This also does allow you to do things like select all the keys, deselect the keys, individual select keys pretty easily. The one thing I will say about the format of this, I do feel like it's a little bit confusing when you do first start using this, the way they have the menu set up. I do kind of wish that the software or the web driver, excuse me, um was set up just a little bit more simple and user-friendly. But over here on the left side is where you do have these additional tabs, where you can see next up, we do have the switch setting option. This is where you can choose different types of switches for compatibility with this keyboard. If you don't see the type of switch you want to use for this keyboard on here, that's fine, don't worry about it. I just recommend using the closest thing as far as the total travel distance goes. So for example, if you're using a switch that bottoms out at 4 mm, try and find a switch that does have those same parameters. Then lastly, you do have this simulation option down here. Over on the next advanced tab is where you'll get options for things like DKS settings. This also does have SOCD, mod tap, toggle key. I have been testing this out with the SOCD, the functionality on has been working out pretty well for me. And then finally, you do have this other settings tab as well. You do have these adjustments that you can make over here on the side and this also does allow you to make adjustments to the pulling rate if you wish to use something other than the 8,000 Hz that this did come standard configured out of the box. After that, they do have a macro option here for the macro editor. The next tab is for the light settings, pretty standard stuff here. We do have a bunch of different presets available to you, you can also adjust the brightness and the speed when setting up any type of RGB settings. All right, guys, so that about wraps things up on the Mons Geek M1 V5 TMR. And I would really say that I don't really have any changed opinions from the first time that I originally reviewed this keyboard. I've just always liked Mons Geek keyboards from the very first second I started reviewing them. I do feel like this is all around a really solid option. The very obvious reason to go and pick this up is for the TMR functionality. If that's an absolute must for you, which I know for a lot of people, they are not a fan of using all magnetic switches out there, absolutely without question the number one reason to go pick this up. But even outside of that, just for a hall effect keyboard in general, if you're planning on leaving this the way it is and keeping the magnetic switches that do come installed in here, I would still say that this is all around a really well-rounded option. I do personally prefer larger form factors myself. The fact this is 75% does have a volume knob up here on the right hand corner, really easy to open up, take apart, make any type of adjustments to it. I feel like the build on this is really solid and though these switches in here are good. I wouldn't say that, you know, they're my favorite switches of all time or anything like that. And as far as the aluminum switch plate goes, again, it does give you a little bit more of that firm type of a filling, which, you know, could be good, depending on what you're looking for, gives you a little bit more stability. But does give you a little bit more of a stiff typing experience. Though, the switches they do come included in here, like I mentioned, pretty good, they don't bottom out too harshly or anything like that. But a couple things that I will leave you with on this is again, I do wish that the web driver that they change that up. Uh something about the layout, it's just even a little bit confusing even for me, even though I've tons of experience making adjustments all other types of keyboards out there. And then lastly, same thing as I said before, um I don't like how they switch to access the wireless functionality, even though it's something that I don't use personally, you have to remove the caps lock key to get to that switch. Still a bit of a pain. I do wish that they'd, I don't know, put on the side or something like that. Maybe up here at the top, I'd actually be the better preference. I mean, obviously it was that easy, they would have done it. Probably they just did this, um for simplicity with the case having to avoid making a cutout. And I'm not sure if they did that if they'd be able to do this ball joint system, um the way this does slide off. But that's just some of my final thoughts um on this keyboard all around. Again, really solid option out there, especially for the price point that it does come in at. And if you're looking for a TMR keyboard, um I can't think of any other real TMR keyboards that I reviewed um out there that I would put above this, especially coming at the price that this does come in at. You do have the smaller form factor, the fun 60, which is still a fantastic option if you don't prefer something that is bigger like this. But all around, solid job from Mons Geek. So if you guys do have any additional questions or feel like I left anything out, please let me know in the comments down below if you have enjoyed watching this video. And I interested in seeing more videos like this in the future, please drop this video a like and subscribe to my channel. Thank you guys so much for watching. I look forward to seeing you in the next one.


