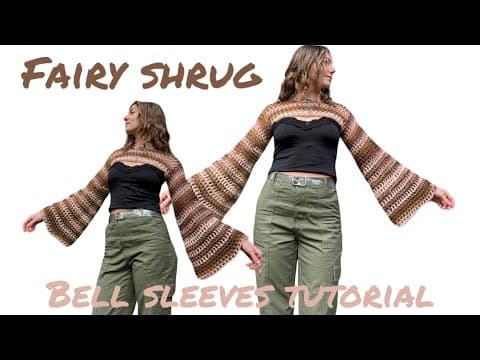
[0:00]Hello everybody, my name is Natalie and today I'm going to be teaching you how to make this flared shrug. I love adding these bell sleeves or flare sleeves to my crochet pieces. I think that it makes it look so whimsical and elegant and dainty and all of those beautiful things. So if you're interested in learning how to create this, continue watching. The shrug that I'm going to be making today, I'm using Loops and Threads Facets yarn. I love this brand of yarn. Um, most of the Loops and Thread yarn is good for making shrugs. This one that I made, I think is out of Karen, um, Silky Smooth or something like that. You want to use any thin yarn, anything that's not going to make it too stiff. If you use too high of a weight of a yarn, then that's just going to make it way too stiff, it's not going to be flowy and it won't give the vibe that you're looking for. I recommend a yarn like this. Um, the Loops and Threads Cotton and Cream yarn, I also have used for a ton of shrugs and I love how those turn out. If you have questions about what yarn to use, drop it in the comments and I'll get back to you. This is a weight four yarn, and I'm going to be using a 5 mm hook. All right, so to start, I'm going to create a slip knot. Put it on my hook. And I'm going to chain an amount that reaches from here to here. So for me, I always do 70 chains, um, but you can figure out how many chains to do by just chaining up and then measuring it and seeing if it lays from this shoulder to this shoulder. Now that I've chained up 70, I'm going to prepare for a double crochet, so I'm going to yarn over and then I'm going to count five chains from my hook. So this is the chain that's on my hook. So this is one, two, three, four, and five. So I've yarned over and I'm going to place my hook into that fifth chain from the hook, yarn over, pull through, yarn over, pull through and yarn over pull through. So I just created a double crochet and this is our first mesh stitch. So I'm going to be chaining two. So I chain two, prepare for another double crochet and I'm going to skip the first two stitches. So this is one, two, and double crochet into the third. Chain two, again, skipping two stitches, one, two, and into the third. Chain two, again, skipping two stitches and into the third.
[3:09]And we're going to continue on this way until we get to the end of the row.
[3:17]I'm about to do my last double crochet of row one. So I chain up two and usually we skip two, but I only have um, two left, so I'm just going to make two is what I have. It's not going to make a big difference. Um, to avoid that happening, if you want it to be perfect, then you have to do a multiple of three. I don't know why I didn't think of that before, but for the authenticity factor, I'm going to leave it. So we chain up five to begin row two, four, five and turn the work. And now I'm going to be placing a double crochet into this first chain two space from the previous row. And then I'm going to chain two and do another double crochet into the next chain two space. Chain two and double crochet. You're going to continue double crocheting into the chain two spaces. Make sure you chain two in between each double crochet. To finish off this row, I now have just one little square left. Um, so I'm going to chain two and just put a double crochet into that space. So it looks like this. And then I'm going to chain five, turn my work and repeat the same thing over again. So again, double crochet into each space with a chain two in between. All right, so I have three rows done and we're going to continue repeating the steps for these rows until we get to a length that you're going to be happy with for this part. So for me, this was one, two, three, four, five, six, seven rows, but I did this one with a triple crochet. We're doing this with a double crochet.
[5:48]I did in fact do 11 rows. You want it to be a good length that's going to be able to reach from the top of your shoulder down to like the center of your armpit. And then we're going to repeat that for the back, but before we get ahead of ourselves, let's make this front panel.
[6:15]I have done 11 rows and I'm going to stop here because this is perfect. It reaches from the top of my shoulder to around my armpit. Let me show you how we start the back panel. The back panel starts the same as every other row with a chain five. Turn your work.
[6:40]And I'm going to place a double crochet into this first one just like how we started every other row. Another double crochet. Chain two, another double crochet and then this is going to be my last double crochet for a little bit. So I have four new squares. And I'm going to grab a stitch marker. I'm going to go to the other side. And I'm going to count one, two, three, four, I'm going to put my stitch marker into the fifth. So now I'm going to count the distance between where I've put my stitch marker and my last double crochet. So that is one, two, three, four, five, six, seven, eight, nine, 10, 11, 12, 13, 14. So then I'm going to multiply 14 * 3, and 14 * 3 is 42. So I'm going to chain up 42 chains. So I've done my 42 chains. Yarn over to do a double crochet and I like to kind of just hold it with my thumb. Just hold it in place and then I'm going to go to this stitch here with the stitch marker and place my hook in and complete the double crochet in this stitch. So it can be a little bit tricky just because of the way that you're connecting it, but it should end looking like this. So you now have this hole for your neck. So your amount of chains might be different than mine based on the size that you made yours, but just remember to count the amount of um squares you have and then multiply that by three. The reason you multiply it by three is because there are three stitches in here, the chain two and then the actual stitch. Um, so that's how we get that. And then to finish off the row, let me take out my marker. All right.
[9:37]To finish off the row, we're just going to do it the same as we have been. Chaining two, double crochet. Chaining two, double crochet. Chaining two, double crochet. This is what the row is looking like. Again, starting the same way that we usually do chaining five, turning the work.
[10:16]Double crochet into the next chain two space. Chain two, another double crochet into the next chain two space. Chain two, double crochet into the next chain two space. So this is where it starts to get slightly different. So instead we don't have any squares to go into. So it's the same as we did at the very beginning when we made our first row of the mesh stitch. So I chain two, yarn over and I'm going to count one, two, and place a double crochet into the third.
[11:09]Chain two, skip one, two, double crochet into the third.
[11:29]We're just going to continue on like that.
[11:48]So I just worked my way all the way around the sleeve and now I'm just about to join it together. I have one more double crochet to make. So I'm chaining two going into this space, chaining two again. And of this original chain five, I'm going to count up three chains. One, two, three. So it's this one right here. And I'm going to slip stitch into that space. And slip stitch again into the chain two space, chain five.
[28:31]This is the final product. I'm absolutely in love with how this came out. If you have any questions, leave them in the comments below. I'd be happy to answer them. If you make this and you use Instagram, tag me on Instagram @cosmicccrochet, an extra C in the middle. I would love to see all of your creations using this pattern. This is one of my favorites. It just makes me feel like a little fairy. If you want some of my other patterns, I'll link them below. You can find them on my Etsy shop and buy them there. So yes, thank you so much for watching and I really hope that you enjoyed and come back for more.


